Vegetable

Growing Cabbage: Timing, Spacing & Pest Control Guide

title: "Growing Cabbage: Complete Garden Guide"

A head of cabbage growing in a garden
Photo: Unsplash on Unsplash

—- title: "Growing Cabbage: Complete Garden Guide" slug: growing-cabbage hub: vegetables category: Vegetable description: "How to grow cabbage from transplant: timing, spacing, soil pH, preventing splitting, and managing caterpillar pests and clubroot. Extension-sourced." date: 2026-06-10 updated: 2026-06-10 author: "Thomas A." reading_time: 9 —-

I don't grow cabbage at my Long Island plot — brassicas have never made it onto my priority list for the vegetable beds I maintain. This guide draws from Cornell Cooperative Extension, Penn State Extension, NC State Extension, and Clemson HGIC, which provide the most thorough published guidance on home cabbage production for the Northeast, mid-Atlantic, and Southeast.

Cabbage is a reliable, productive cool-season crop that stores well and rewards careful timing. The fundamental management challenge is getting the head to mature during cool weather — which means either a spring crop that finishes before summer heat or a fall crop that matures in October cool. The caterpillar pest complex (cabbageworm, cabbage looper) is the primary management demand, and physical exclusion with floating row cover is more effective than any spray program.

Variety selection

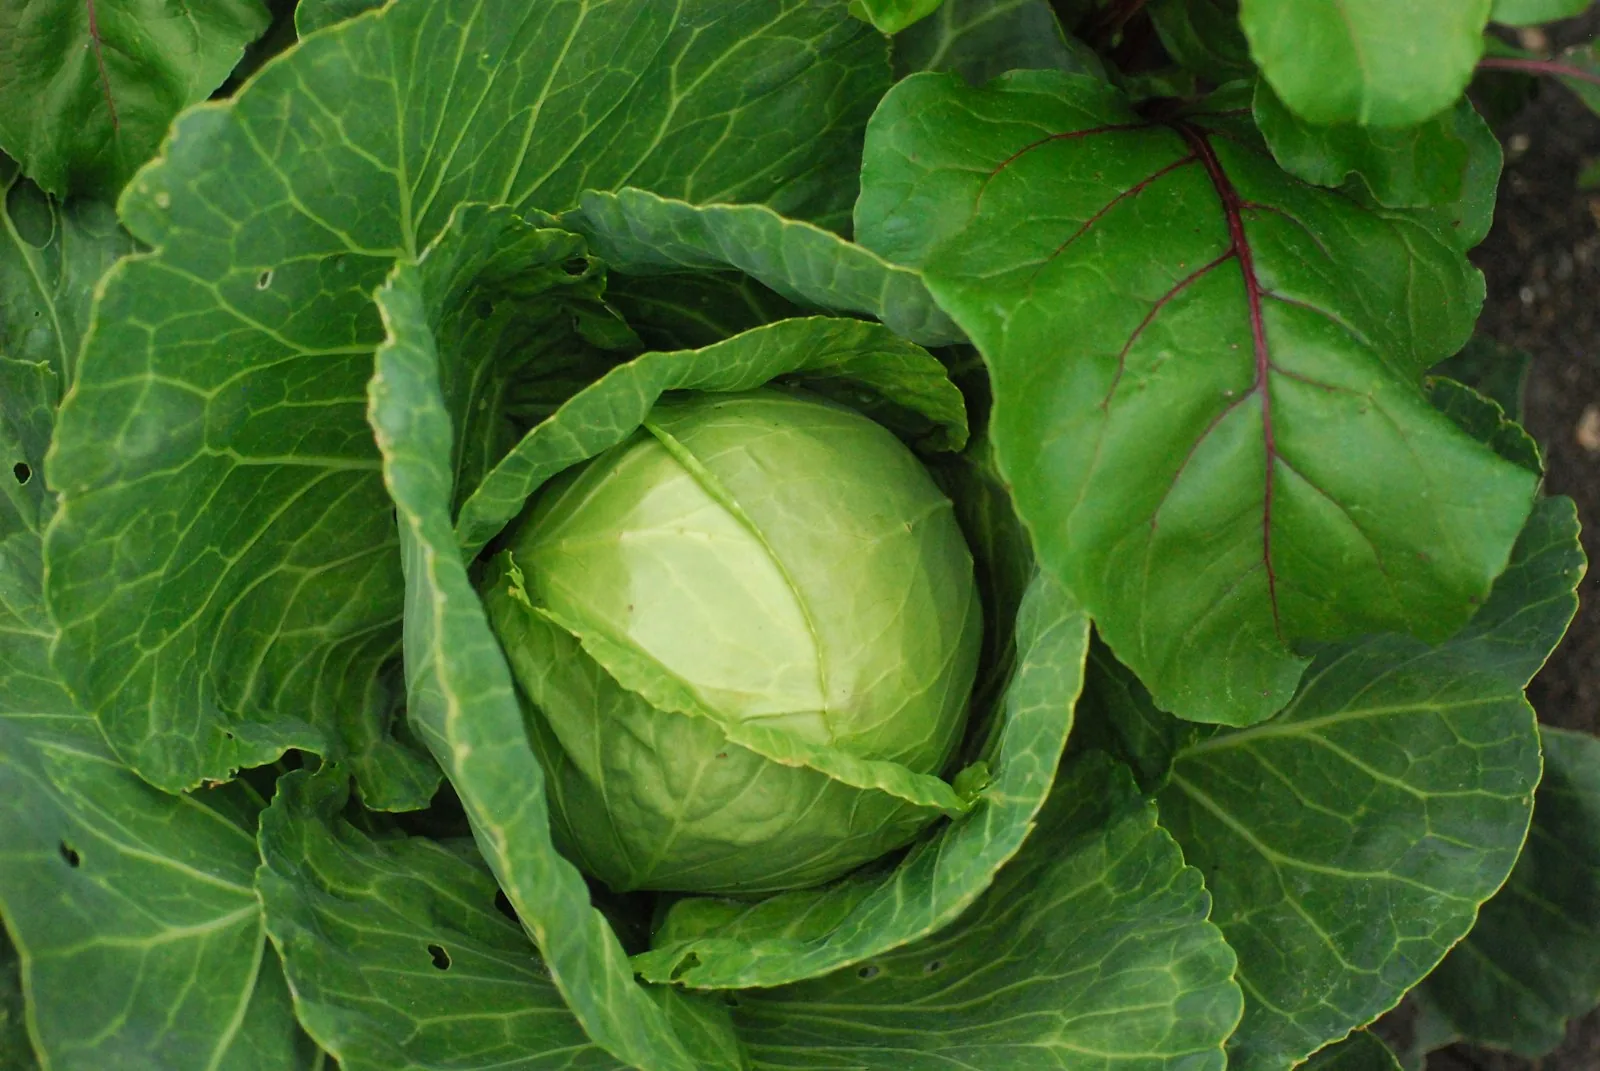
Brassica oleracea var. capitata is the cultivated cabbage. Types vary in head size, leaf texture, and maturity.

Green cabbage: 'Stonehead' (67 days, compact, 3—4 lbs, tolerates summer heat better than most), 'Farao' (63 days, early, reliable), 'Bronco' (71 days, standard-size), 'Storage No. 4' (90 days, excellent keeping quality for storage). Per Cornell Cooperative Extension, early types (63—70 days) are recommended for spring crops because they mature before summer heat arrives.

Red cabbage: 'Ruby Ball' (68 days), 'Ruby Perfection' (80 days). Per Penn State Extension, red types are generally slightly more cold-tolerant than green types and store well.

Savoy cabbage: 'Alcosa' (82 days), 'Savoy King' (90 days). Crinkled, tender leaves. Per NC State Extension, savoy types have better cold-hardiness and can survive light frosts even at heading stage.

Napa/Chinese cabbage: Different species (B. rapa var. pekinensis); see companion guide if needed.

Days to maturity (from transplant): 63 days ('Farao') to 90+ days ('Savoy King', 'Storage No. 4').

USDA zones and temperature requirements

Cabbage grows as a cool-season annual across USDA zones 1—9. Per Cornell Cooperative Extension, cabbage grows best at daytime temperatures of 60—70°F. Plants tolerate light frost well; established plants can survive temperatures as low as 20°F per NC State Extension. Per Penn State Extension, \"heat above 80°F causes heading to be delayed and quality to decline.\"

In zone 7a (Long Island):

Starting transplants

Per Cornell, start seeds indoors 4—6 weeks before the intended transplanting date. Germination is fast at 65—75°F (5—7 days). Use a seedling heat mat during germination for consistent results.

Harden off transplants for 7—10 days before planting outdoors. Per NC State Extension, cabbage transplants are frost-hardy after hardening and can be set out in temperatures as low as 25°F in spring.

Spacing and planting depth

Per Cornell Cooperative Extension, space transplants 12—18 inches apart in rows 24—36 inches apart, depending on target head size. Per Penn State Extension, \"for small heads (2—3 lbs), space 12 inches in the row; for large heads (4—5 lbs), space 18—24 inches.\"

Plant transplants at the same depth they were growing in containers, or 1 inch deeper to give the stem additional support.

Soil and fertilizing

Per Cornell, cabbage grows best in fertile, moisture-retentive loam with a pH of 6.0—7.5. Per Penn State Extension, maintaining pH above 6.5 reduces clubroot risk significantly.

Fertility: Cabbage is a heavy nitrogen feeder. Per Cornell, incorporate 3—4 pounds of 10-10-10 fertilizer per 100 square feet before transplanting. Side-dress with nitrogen when plants are half-grown (4—5 weeks after transplanting): 1/4 cup of ammonium nitrate per plant, or Espoma Plant-tone 5-3-3 at 1 cup per plant. Per NC State Extension, stop nitrogen applications 4—6 weeks before harvest to reduce risk of head splitting.

Calcium: Per Clemson HGIC, tip burn on inner leaves is caused by calcium deficiency, usually due to inconsistent moisture rather than low soil calcium. Maintain consistent irrigation.

Watering

Per Cornell, cabbage needs 1.5 inches of water per week. Per Penn State Extension, consistent moisture throughout head development is critical — drought stress followed by heavy rain or irrigation causes heads to split as the inner leaves expand faster than the outer wrapper leaves.

Reduce irrigation slightly in the final 2—3 weeks before harvest to reduce split risk. Soaker hose delivers consistent root-zone moisture without wetting foliage.

Preventing splitting: Once a head is mature, harvest promptly. Per NC State Extension, leaving mature heads in the ground during wet weather almost guarantees splitting. If harvest must be delayed, twist the head 1/4 turn to break some roots — this reduces water uptake and slows splitting without damaging the plant.

Pests: the cabbage worm complex

Imported cabbageworm (Pieris rapae): The most common caterpillar pest on brassicas in the Northeast and mid-Atlantic. Per Cornell Cooperative Extension, the small white butterfly visible in most gardens lays eggs on brassica leaves; larvae are green and velvety and can bore into developing heads. Per NC State Extension, Agribon row cover from the day of transplanting prevents the adult butterfly from reaching plants. This is the most effective organic control.

If floating row cover is not used or if caterpillars are already present, Monterey BT (Bacillus thuringiensis (BT spray) var. kurstaki) is the OMRI-listed biological caterpillar treatment of choice per both Cornell and Penn State. Apply in late afternoon or evening; BT breaks down in UV light and is most effective when ingested by young larvae.

Cabbage looper (Trichoplusia ni): Similar appearance; larvae arch up in a \"looping\" motion. Same BT treatment applies per NC State Extension.

Cabbage aphids (Brevicoryne brassicae): Gray, waxy aphids that colonize inner leaves and leaf undersides. Per Penn State Extension, Safer insecticidal soap applied directly to aphid colonies is effective.

Root maggot (Delia radicum): Per Cornell, larvae damage roots, causing wilting and plant death in young transplants. floating row cover from transplanting through mid-June excludes the adult fly; physical barriers (collars placed flat on soil surface around stem bases) reduce egg-laying.

Diseases

Clubroot (Plasmodiophora brassicae): Per Penn State Extension, the most serious brassica disease, causing massive root galling and plant stunting. The pathogen persists in soil for 10—20 years. Once present, there is no practical cure. Per NC State Extension, liming to pH 6.5—7.5 reduces severity; resistant varieties provide partial protection. Do not introduce transplants from outside sources without checking provenance.

Black rot (Xanthomonas campestris): Per Cornell, a bacterial disease causing V-shaped yellow lesions at leaf margins, with darkened veins visible when leaf is held to light. Spread by infected seed and wet weather. Use disease-free transplants; avoid overhead irrigation; rotate brassicas on a 3-year minimum.

Downy mildew: Per Clemson HGIC, similar to broccoli — yellow patches on upper leaves, white sporulation underneath. Improve airflow; reduce overhead watering.

Common problems

SymptomMost likely causeFix
Heads split before harvestExcess rain or irrigation after maturity; over-matureHarvest promptly; twist head to slow water uptake
Caterpillar holes in leaves or headImported cabbageworm or looperRow cover from transplanting; Monterey BT if infestation present
Plants fail to head; only leaf growthHeat; insufficient nitrogen earlyFall crop timing; fertilize at half-grown stage
Yellow leaf margins with dark veinsBlack rot (bacterial)Remove infected plants; rotate; disease-free transplants
Stunted plants, swollen rootsClubrootRaise soil pH to 6.5+; long rotation
Gray waxy insects inside headCabbage aphidsinsecticidal soap; row cover
Plant wilts; maggot visible at rootRoot maggotRow cover early season; stem collars at transplanting
Recommended gear: Best Soaker Hose for Vegetable Gardens (2026) — our buyer's guide covering picks for every budget, ranked by Extension publication consensus and personal use.

Frequently asked

Should I grow cabbage in spring or fall in zone 7a?

Per NC State Extension, fall is the more reliable season for zones 5—7. Spring crops race against summer heat; if maturity coincides with a heat wave, heads may bolt or produce poor-quality, bitter leaves. A fall crop transplanted in late July matures in September—October, when temperatures are dropping — the direction brassicas prefer. Savoy types can tolerate light frost at heading, extending the fall window into November in zone 7a.

How do I prevent cabbage heads from splitting?

Per Cornell Cooperative Extension, splitting occurs when mature heads take up excess water during rainy periods. Harvest promptly once heads reach target size and firmness. If the harvest must be delayed, twist the plant 1/4 turn to break some feeder roots, reducing water uptake. Consistent irrigation that avoids large swings between dry and wet also reduces split risk, per Penn State Extension.

What is the most effective way to control cabbage worms?

Per Cornell and NC State Extension, Agribon row cover placed over transplants from the day they go in the ground prevents the imported cabbageworm butterfly from accessing plants entirely — no eggs, no larvae. This is the most reliable control. If row cover is not available or has already been removed, Monterey BT is the organic caterpillar treatment, applied in the late afternoon so larvae feed on it overnight before UV degrades the BT protein.

How do I know when cabbage is ready to harvest?

Per Penn State Extension, squeeze the head firmly — a mature head is solid and does not give. Squeeze the same head several days in a row to track firmness development. Do not wait until the outer leaves are loose or the head begins to crack at the top — those are signs the plant is past peak maturity and splitting is imminent. Cut the head with a sharp knife at the base, leaving the outer leaves and a short stem; side shoots will develop after harvest for a small secondary harvest.

Sources